Time for another quick and dirty blogpost (EDIT: It turned out to be pretty huge :-)). I hope to be expanding this scenario later, but for now I just wanted to get it out there.
Consider a scenario such as the following: An end-user of one of your IT systems has an issue with it, and submits a support request somewhere in SharePoint (or any one of the hundreds of other SaaS applications that have a connector available in Microsoft Flow). You investigate and resolve the issue.
Wouldn't it be great if the user was notified automatically that the incident was resolved and that (s)he could even provide feedback on how well or how quickly it was resolved right from a pretty email in Outlook? Hint: The answer is yes, that would be great!
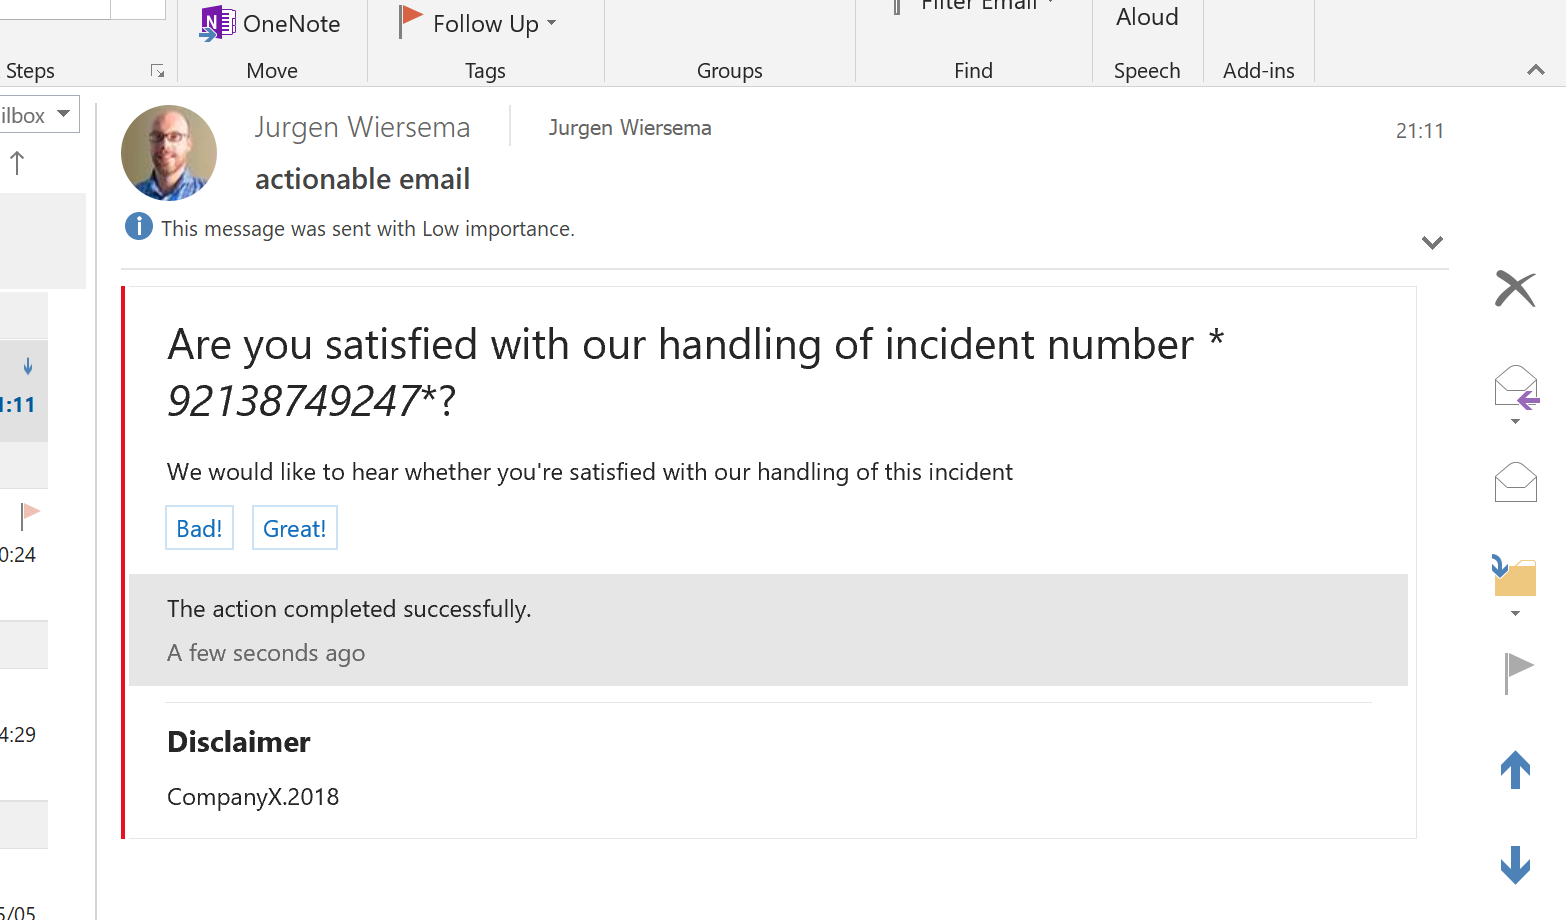 The actionable email it's all about.
I've seen several blog posts showing how to achieve such a thing using Actionable emails aka Adaptive cards, but they all required building a (simple) API backend.
This blog shows how to do it with just SharePoint Online and Microsoft Flow! You probably have a license for those otherwise you wouldn't be reading this. It's also super easy to achieve.
No developer required!
You can actually use this for any business case that requires automating the collection of feedback from someone and storing it somewhere in Office365. Or you can use it to build a pretty formatted newsletter with a Poll in it. Possibilities: endless.
The key issue with achieving this has been resolved last week. It had to do with authorization headers that the actionable message sent, which Flow didnt like. See the actionable messages security requirements for more details.
Let's get started. We need five things:
1. An approved Actionable email provider in your own O365 tenant.
2. A SharePoint list to store the responses.
3. A Flow that will receive the feedback from the users.
4. The JSON of the Actionable Message you want to send.
5. Another Flow that sends the Actionable message email, requesting for the feedback.
So, first of all, go to the Actionable email developer dashboard. That link will go to the dashboard in the tenant you're logged into right now. Setup a new provider with scope Your organisation. Save the Provider id (originator) guid somewhere in a text file.
Make sure you get the provider in an Approved state. Read the Microsoft documentation on registering a provider if you get into trouble.
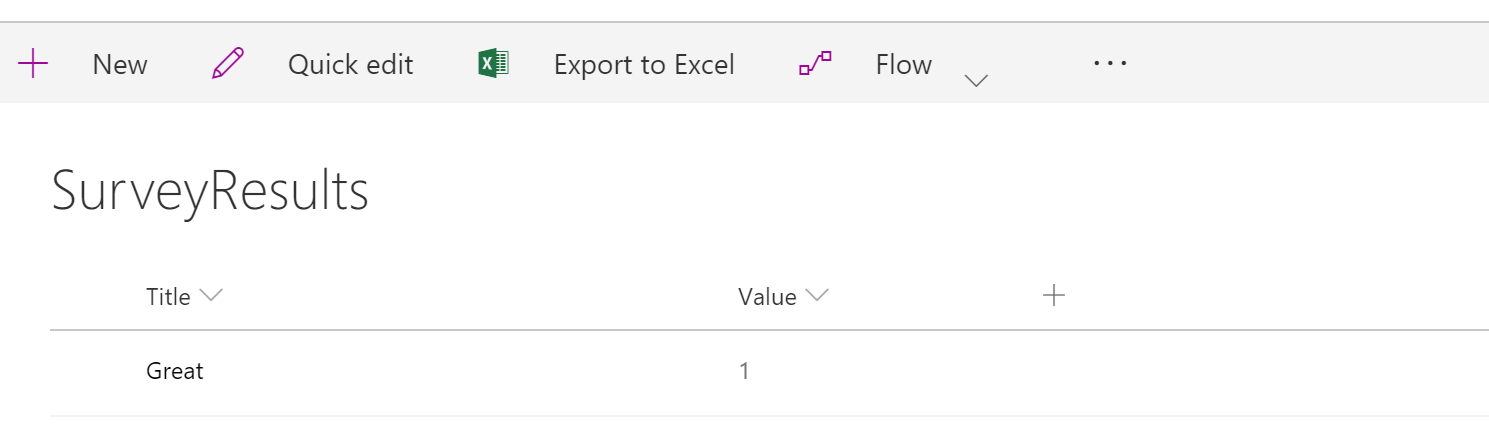
Then, create a SharePoint list somewhere in a site collection in your tenant. I've only used two fields: The standard Title field, and I added a field of type Number called Value.
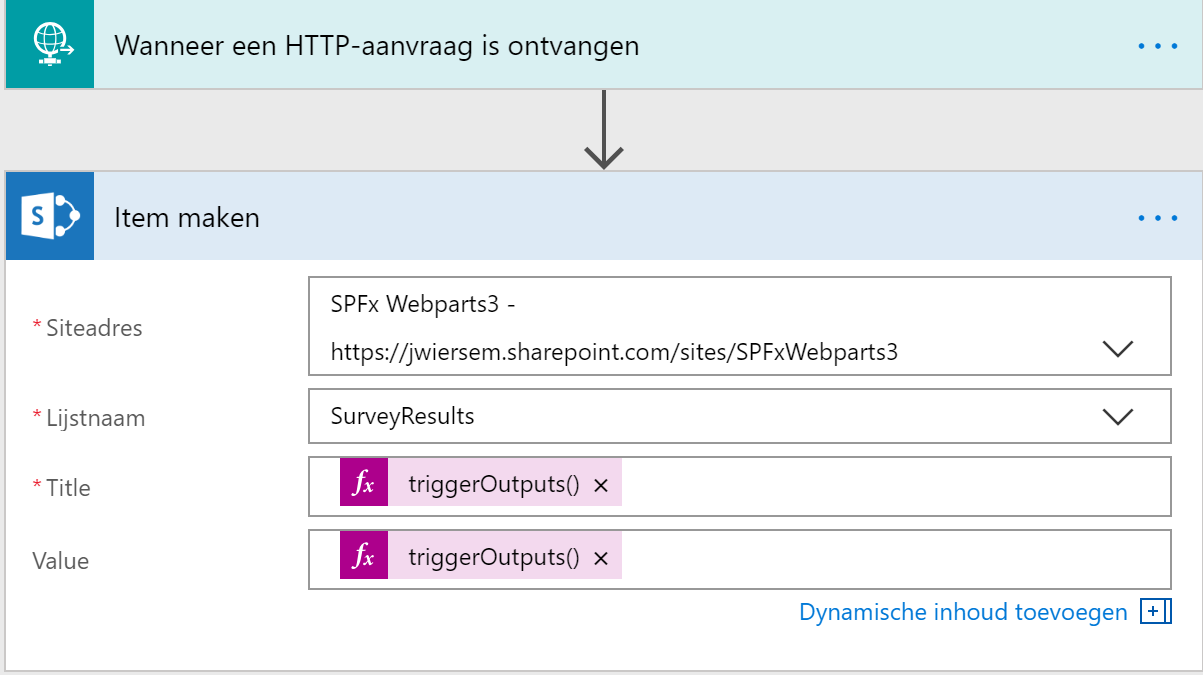
We'll first create the receiving Flow (the 'API') first, because it's super simple in my case.
Go to https://flow.microsoft.com and create a new Flow, starting from nothing (dont select a template).
As the trigger, add Incoming HTTP request as we will be using a HTTP POST operation in the actionable email to receive the feedback from the user. The actual user response will be in URL parameters (will tell you later what those are).
Then you only need to add one other operation, which is Create a SharePoint list item. As the field values, put in the following expressions (so use the MS Flow Expressions tab):
Title field: triggerOutputs()['queries']['title']
Value field: triggerOutputs()['queries']['review']
Like I said, we will be collecting these values from the URL parameters that are sent when a user presses a button in our email.
Now save the Flow. After saving you can collect the URL you will need to use later from the trigger: copy-paste it somewhere. It will start with something similar to https://prod-59.westeurope.logic.azure.com.
 The receiving end.
Now we need to build the actionable email message. Currently, there are two formats we could use: The MessageCard format (sort of legacy already) or the adaptive card format. I've used the former, but feel free to use the newer format. There are tools online that help you with building the JSON definition, like the message card playground.
However, on this page I've provided a ready to use JSON definition to be used in MS Flow.
Note that I've used double at-signs (@@) in order to escape the single @ character, which is reserved in MS Flow.
You will need to replace a few things in this JSON:
1. The originator GUID. Use the one from the actionable email provider dev dashboard you saved.
2. The following will need to be replaced by variables that hold the URLs to your receiving flow, by using Flow variables in the Flow we will be creating next.
@{outputs('UrlSlecht')} and @{outputs('UrlGoed')}
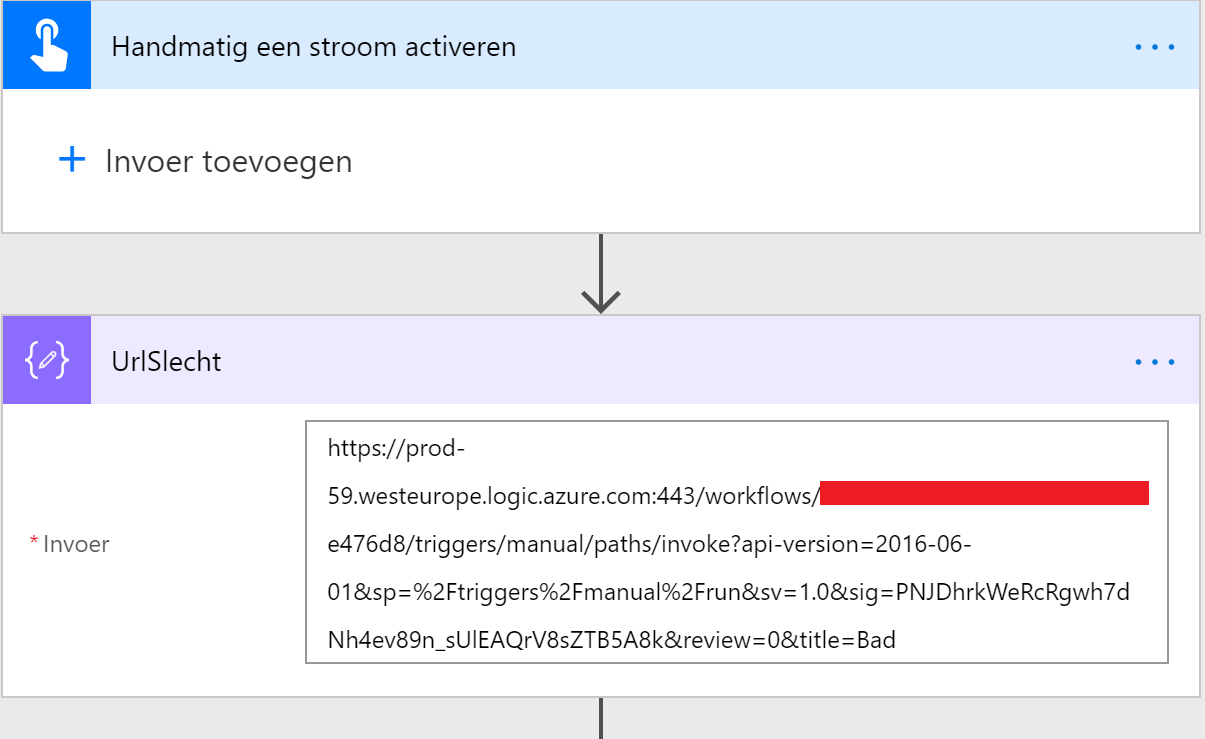
So, go back to Flow and create another Flow. I've will be using the easiest trigger, which is the Buttons for Flow. This will allow you to simply start the Flow manually whenever you want, very easy for testing. Of course you can also use a SharePoint trigger for it like When an item has been created.
Create two variables of type string and call them UrlBad (in my case UrlSlecht) and UrlGood (UrlGoed).
Fill in the URL to the receiving flow that you saved somewhere, but add something to the back of the URL first.
URLBad: Add &review=0&title=Bad
URLGood: Add &review=1&title=Great
So, these are the infamous URL parameters we want to collect on the receiving end. They will be sent when a user presses the Bad! or Great! buttons respectively.
We only need two more actions. Start with a Compose action. Enter the JSON of the MessageCard in it (where you have replaced the originator id with your own).
For the target of the two HTTP Post actions in the JSON, select the correct variable (UrlBad or UrlGood) if this doesnt go right automatically.
Now the final step: Add an Send email action and make sure you send the email to an address within your O365 tenant.
In the body, we'll put the following expression:
concat('<script type=''application/ld+json''>',outputs('Compose'),'</script>').
Replace outputs('Compose') with the output of the last Compose action, by selecting it in the expression builder.
Now, trigger the Flow! You should be receiving a nicely formatted email with buttons that can be pushed within Outlook itself. The mail will tell you whether the button press will have been received correctly by the 'API' Flow and the response should be stored in SharePoint.
Here's the completed sending Flow:
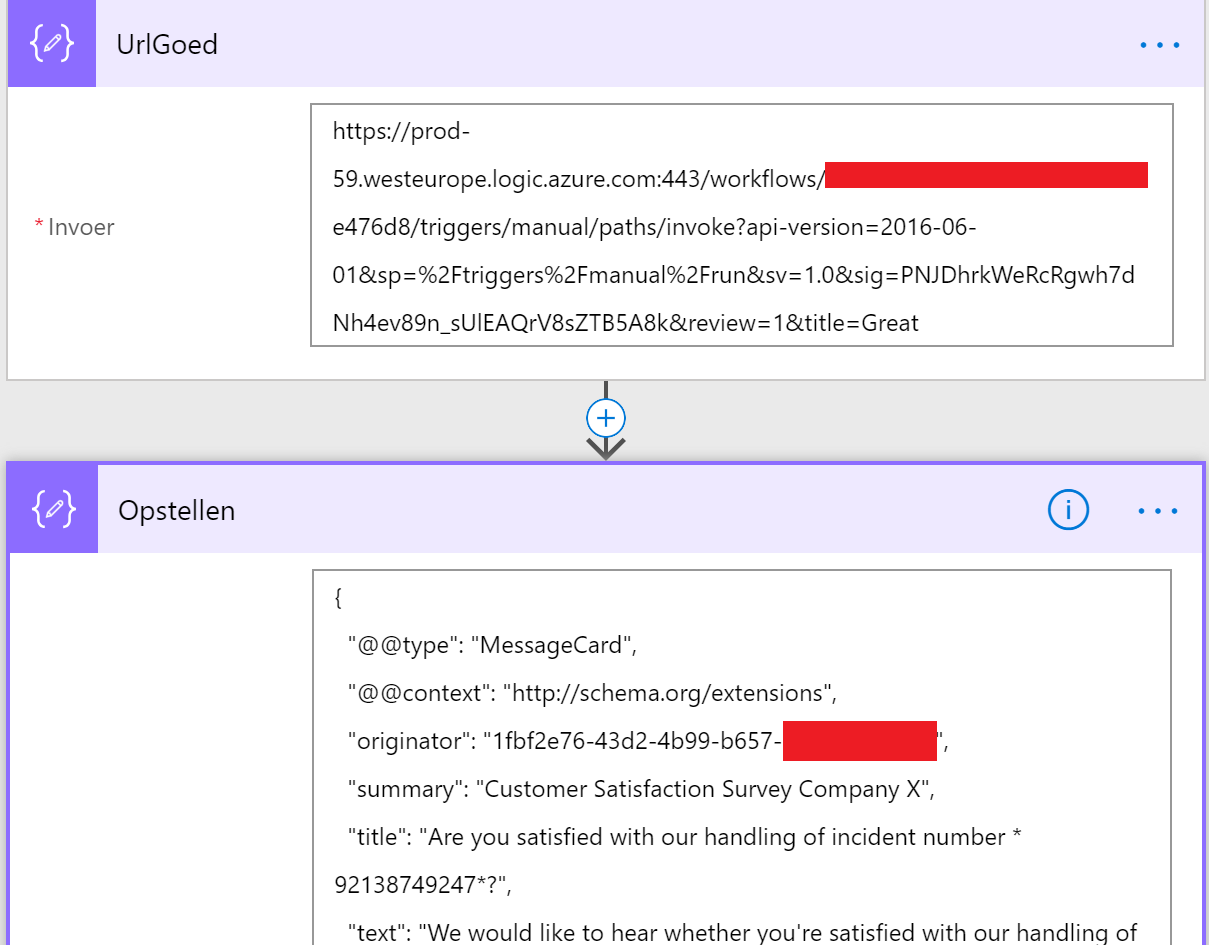
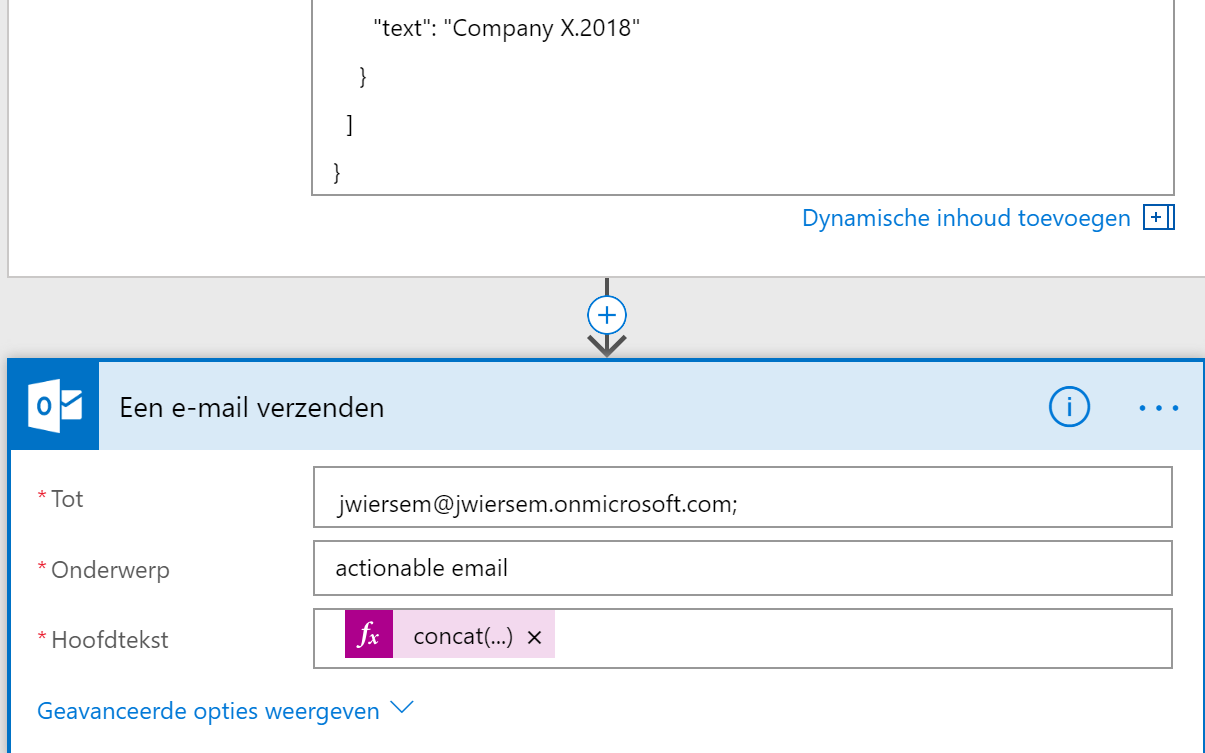 The Flow that starts the feedback request. Setup the URLs to the receiving End, define an Actionable message in JSON and send it via email.
This wraps up this article, hopefully you can see the potential and the ease of implementation (even though there are lot of steps, if you're confident in using Office365 they're not that difficult to follow).
Time to unify Office365!
PS:
Things I would like to add later:
Send a HTTP Body when a user presses the button (instead of URL parameters)
Report back a message to the user in Outlook (like Thanks for your reply)
Implement a complete scenario, not just a Proof of concept.
NB: Use this solution with care, as the receiving Flow can be called by anyone across the internet if they get the URL to your receiving Flow.
This was Part II: Collect feedback with Actionable emails within Office365
Part I: The potentail of actionable messages in Office365
Part III: Finishing the support incident scenario