In this post I will show how to run a Java App on Azure WebApps. I was tasked to find out if it was possible to run a site created in Mura CMS, which is a Java application, on Azure. Of course it is possible to run it on a VM, however the client was curious whether it could be easily done in the Azure PaaS offering because of better maintainability and less migration costs.
I googled for a while and found a few good resources, which helped guide me into the world of JAVA on Azure.
I found out that Mura CMS is a ColdFusion application that runs on a webserver like ColdFusion or Lucee, and a database like MySQL. Lucee seemed to be the popular choice so I went with that. Lucee runs on Apache Tomcat on Java.
This first step I took was to create a WebApp + MySql server in the Azure Portal. You need to fill in a bunch of fairly straightforward stuff like the appservice address, the mysql server address and admin user/pass etc. Everything has good validation so if you can create the resources in the end it will always go well. I used the database name muradb
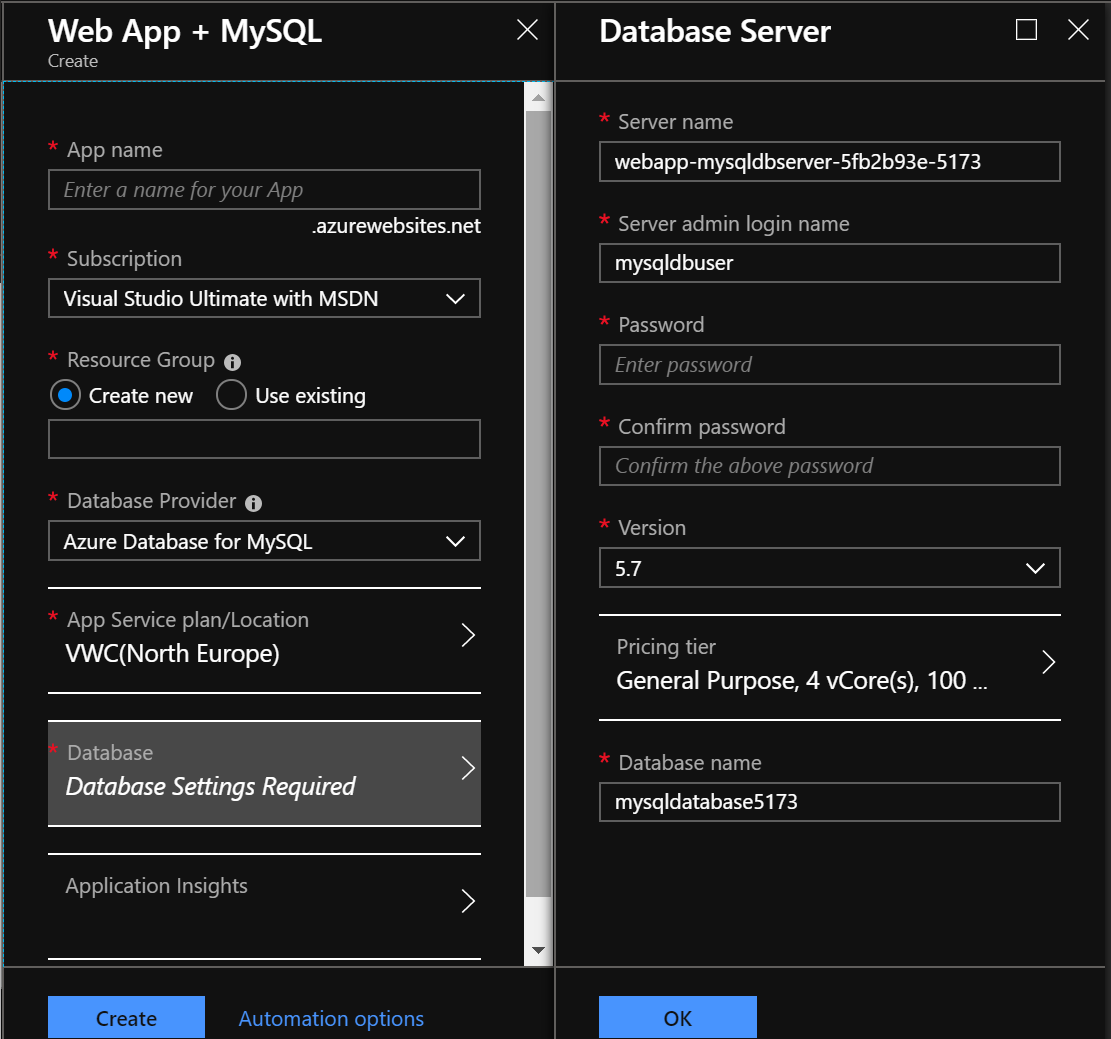
After creation you will have a running website and a MySql server with an empty database. Make note of the following details:
KUDU site: https://yoursite.scm.azurewebsites.net/
Lucee admin: https://yoursite.azurewebsites.net/lucee/admin/web.cfm
Mura CMS admin: https://yoursite.azurewebsites.net/admin
MySql address: yourmysqlserveraddress.mysql.database.azure.com
user: mysqldbuser@yourmysqlserveraddress
pass: topsecret
dbname: muradb
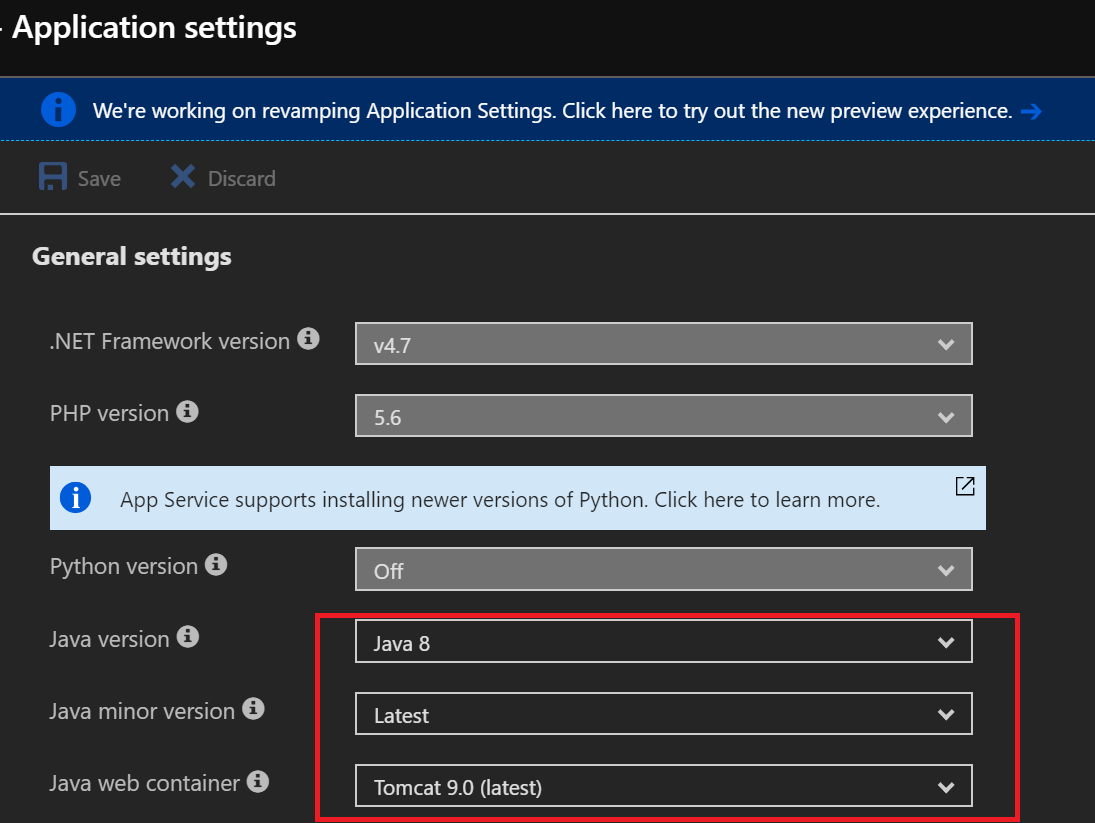
Step 2 is to turn the website into a JAVA Tomcat server. Go to the Application settings of the App service in the portal and set the JAVA version to 8 and the Tomcat version to 9 (latest). If your requirements are different feel free to select different values but this blog post assumes the latest version of both which are compatible with the versions of Lucee and Mura CMS I used.
Like I said earlier, we need to install Mura CMS on top of Lucee. We need to download both applications first and created a so called WAR-file. This is nothing more than a zip-archive with an extension .war. Go to https://download.lucee.org/ and download the WAR file there, the version I got was 5.2.9.31 (Release tab). But I'm sure any latest version is fine.
I then went to the Mura CMS github: https://github.com/blueriver/MuraCMS and I downloaded the latest version (7.1) of the master branch as a zip file.
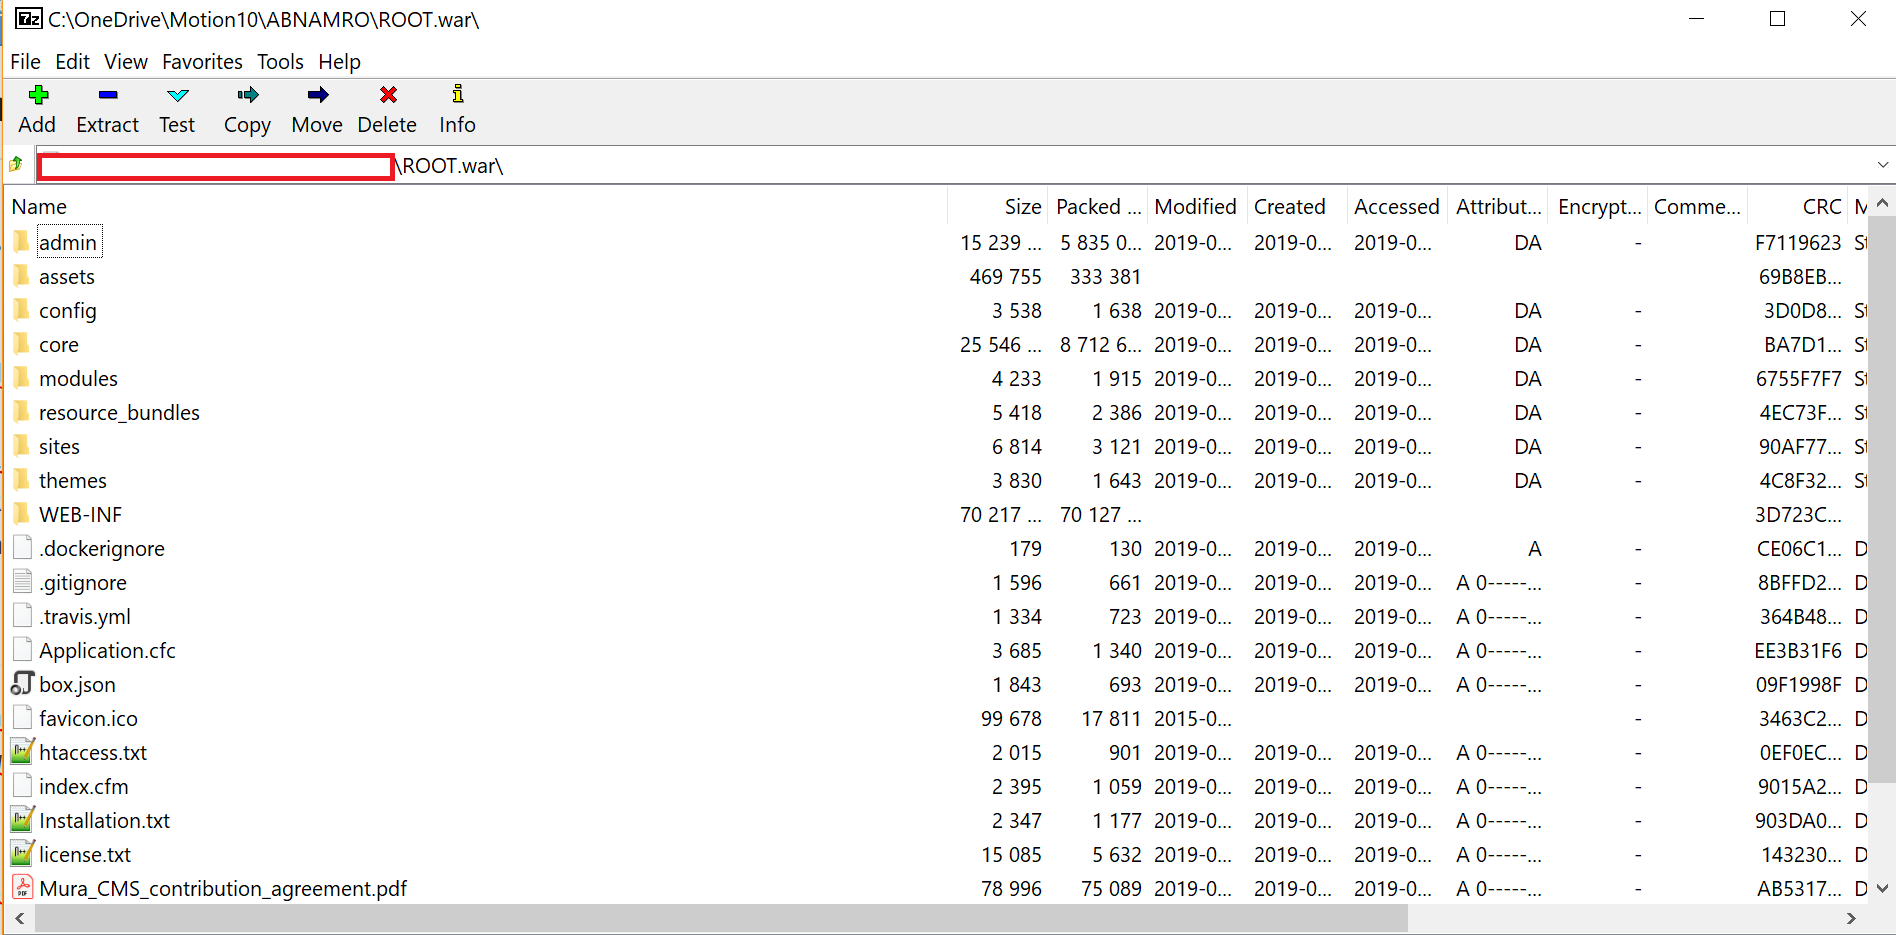
You now have lucee-5.2.9.31.war and a folder with the Mura CMS files. We simply need to merge the contents of the Mura CMS folder with the lucee WAR file and rename it ROOT.war (I believe the casing matters so use upper case). There is one file you need to overwrite which is Application.cfc
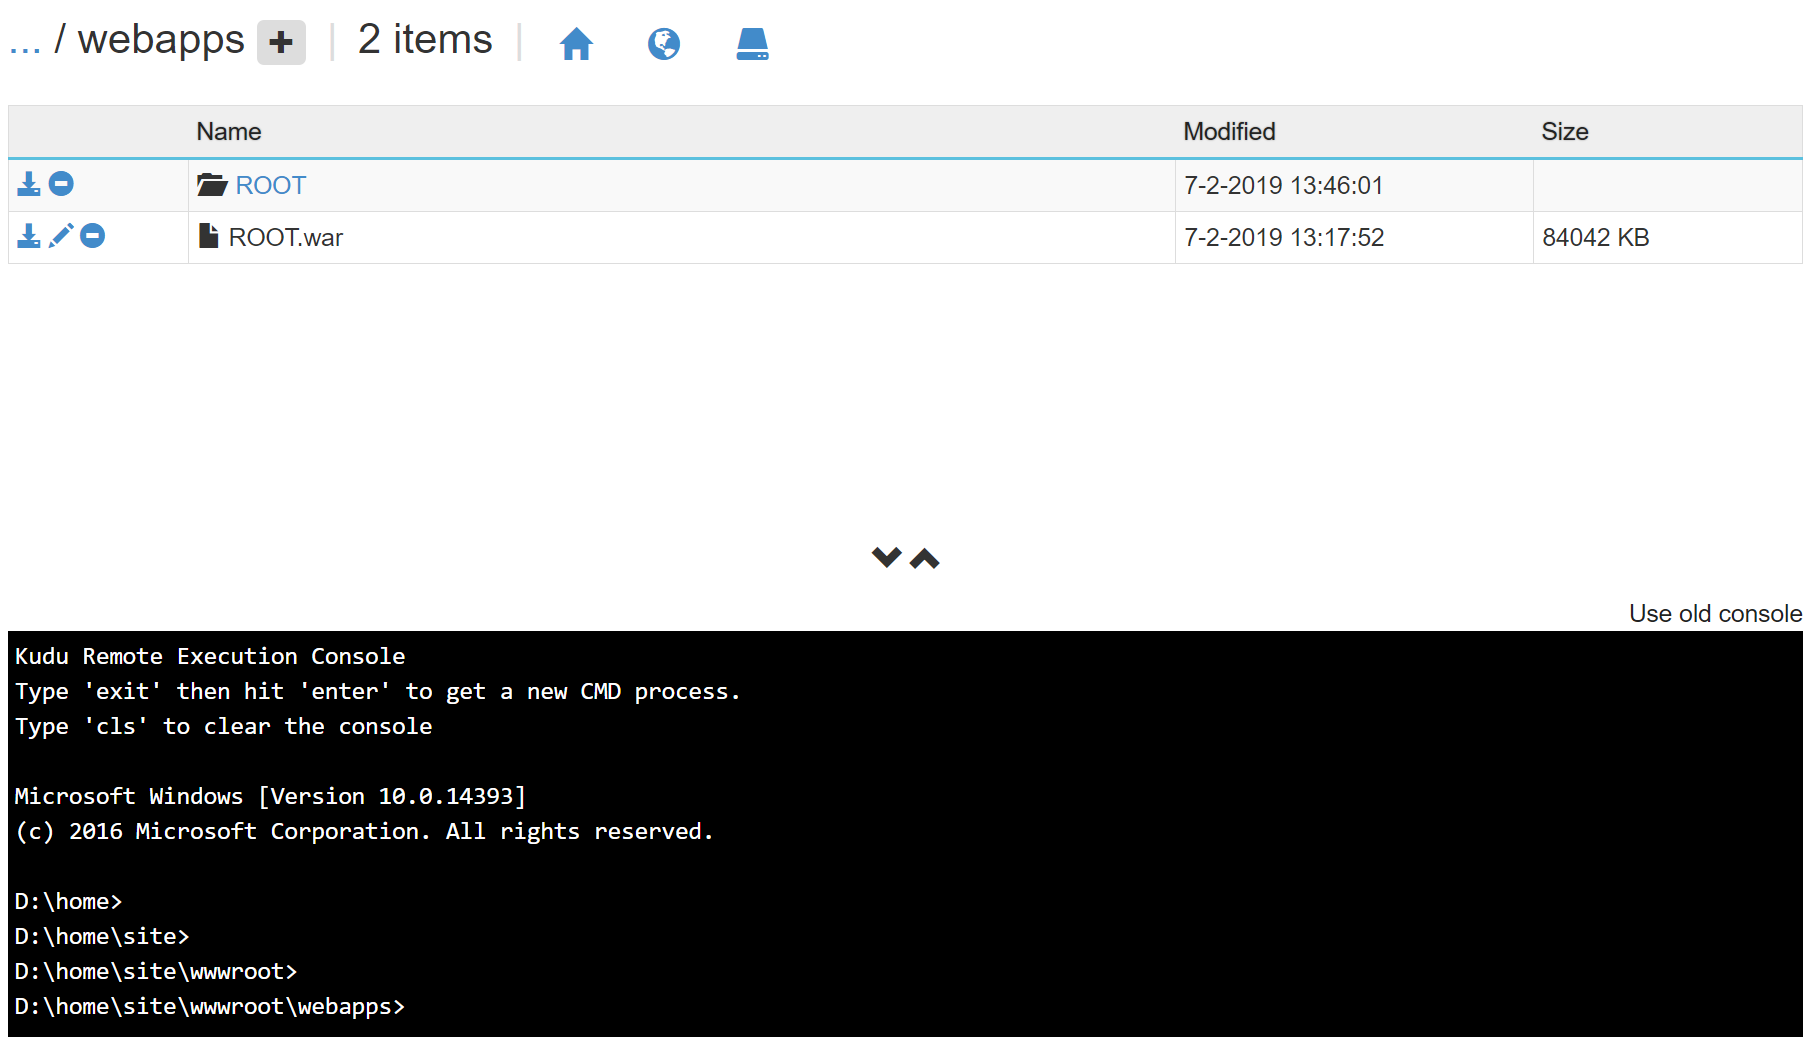
Now you need to open of KUDU for your Azure site, which is located at: https://yoursite.scm.azurewebsites.net/
Go to the folder /site/wwwroot/webapps and delete the ROOT folder that is already there. After this upload the ROOT.war file into this folder by dragging it in the page.
This will automatically trigger the unpacking of this archive and you will see a new ROOT folder appearing and in it all the files you packed.
This will take a few minutes so have patience.
After a while, if you browser to your website you should be presented with the Mura CMS installation screen (at the root of your domain)!
However, in order to complete the installation of Mura CMS you first need to create a datasource inside Lucee.
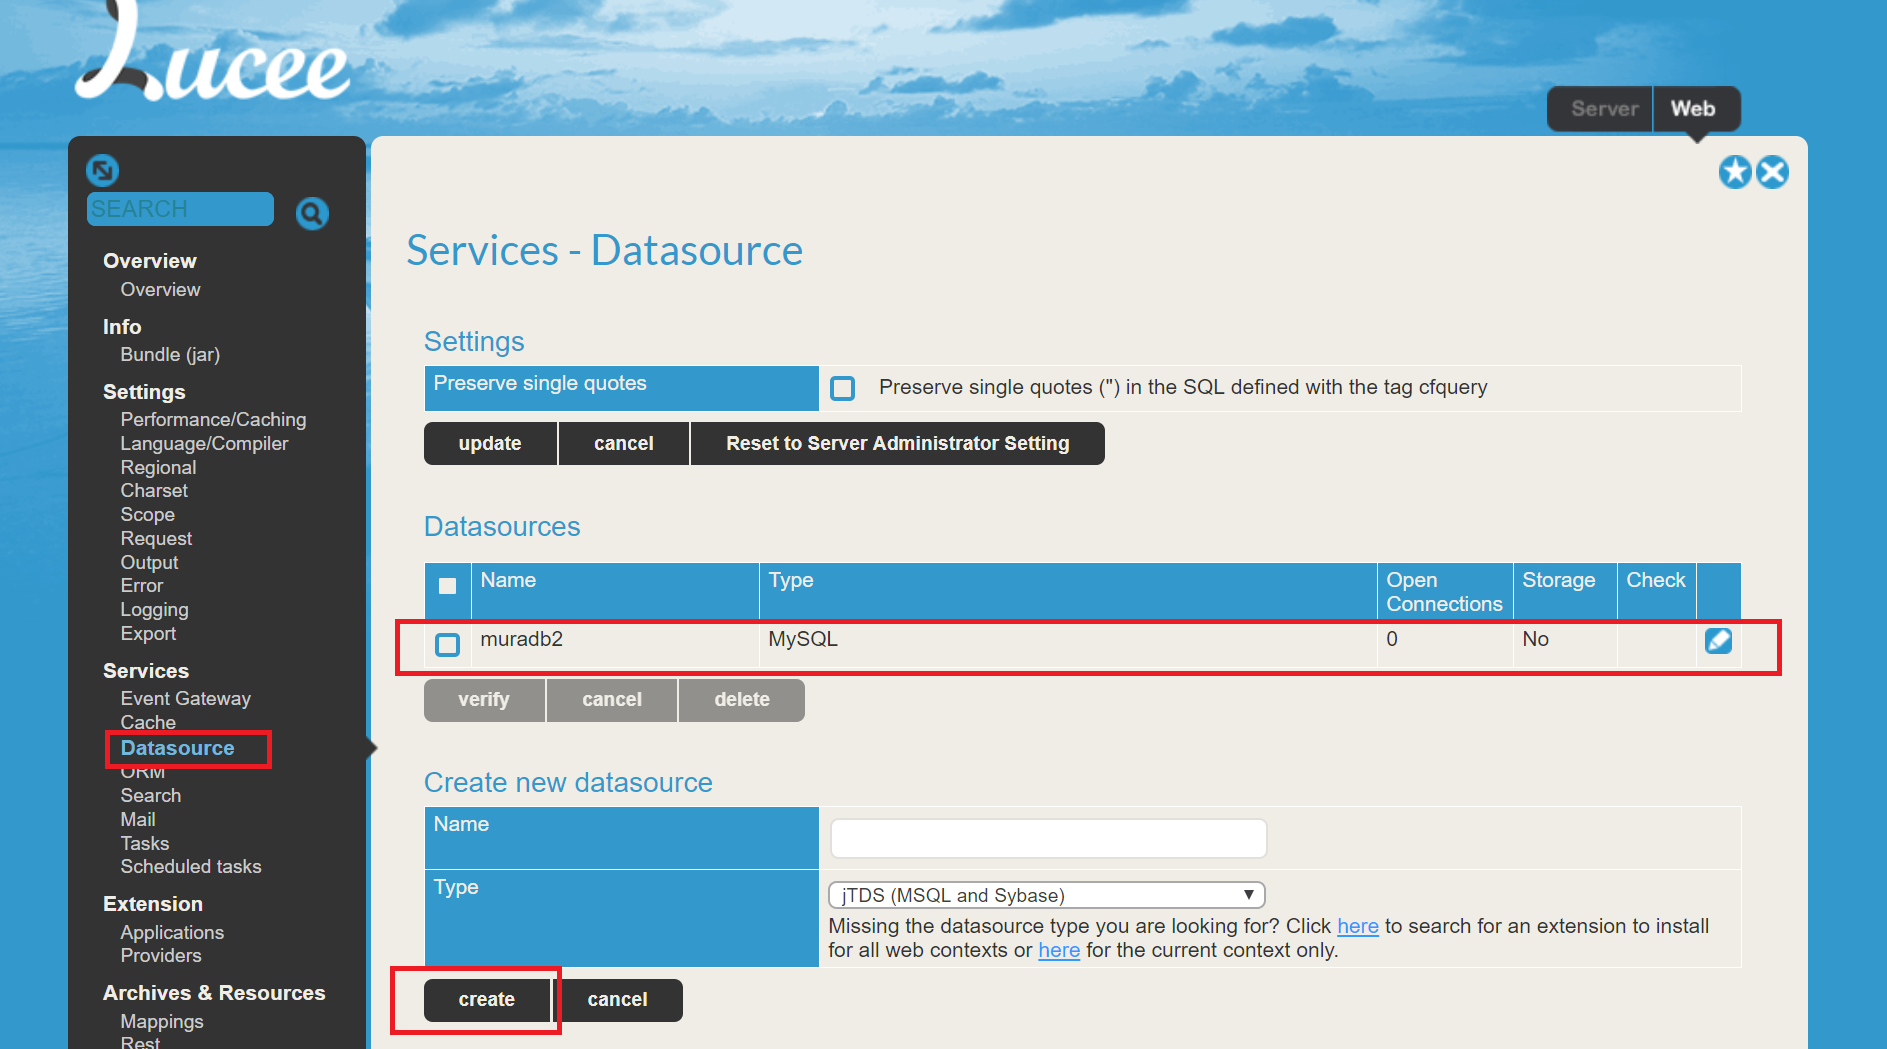
We need to go to the Lucee admin portal https://yoursite.azurewebsites.net/lucee/admin/web.cfm and then to datasources and create a new datasource with the connection details of your MySQL server and your empty database muradb.
So use the MySQL server address and username+password to create the connection. Make sure to name it muradb (or at least write down the name of the connection you chose). You'll need the connection name during the Mura CMS installation.
After successfully creating the datasource in Lucee, go back to the root of your site where the Mura CMS installation screen is waiting. You just need to fill your new datasource name and fill in a admin username and password for Mura CMS.
You will also get the questions on whether you would to include SiteID and index.cfm in your URLs.
Check both checkboxes for your site to work with the default settings.
If you don't do this, you will need to update the web.config file for your pages to be served correctly (out of the scope of this article). If you forget to do this or want to change this later, then you will need to edit the settings in settings.ini.cfm in the ROOT/config folder of your webserver's webroot.
After you have done so successfully it will say you're all done and can login. In my experience, clicking the login would seem to actually start the installation because it will take a very long time for Mura to respond. So again, you need to be a little patient and perhaps endure a timeout.
You should now have a default (empty) Mura site and a working admin interface!
Go to the Mura CMS admin interface located at https://yoursite.azurewebsites.net/admin and start creating your site!
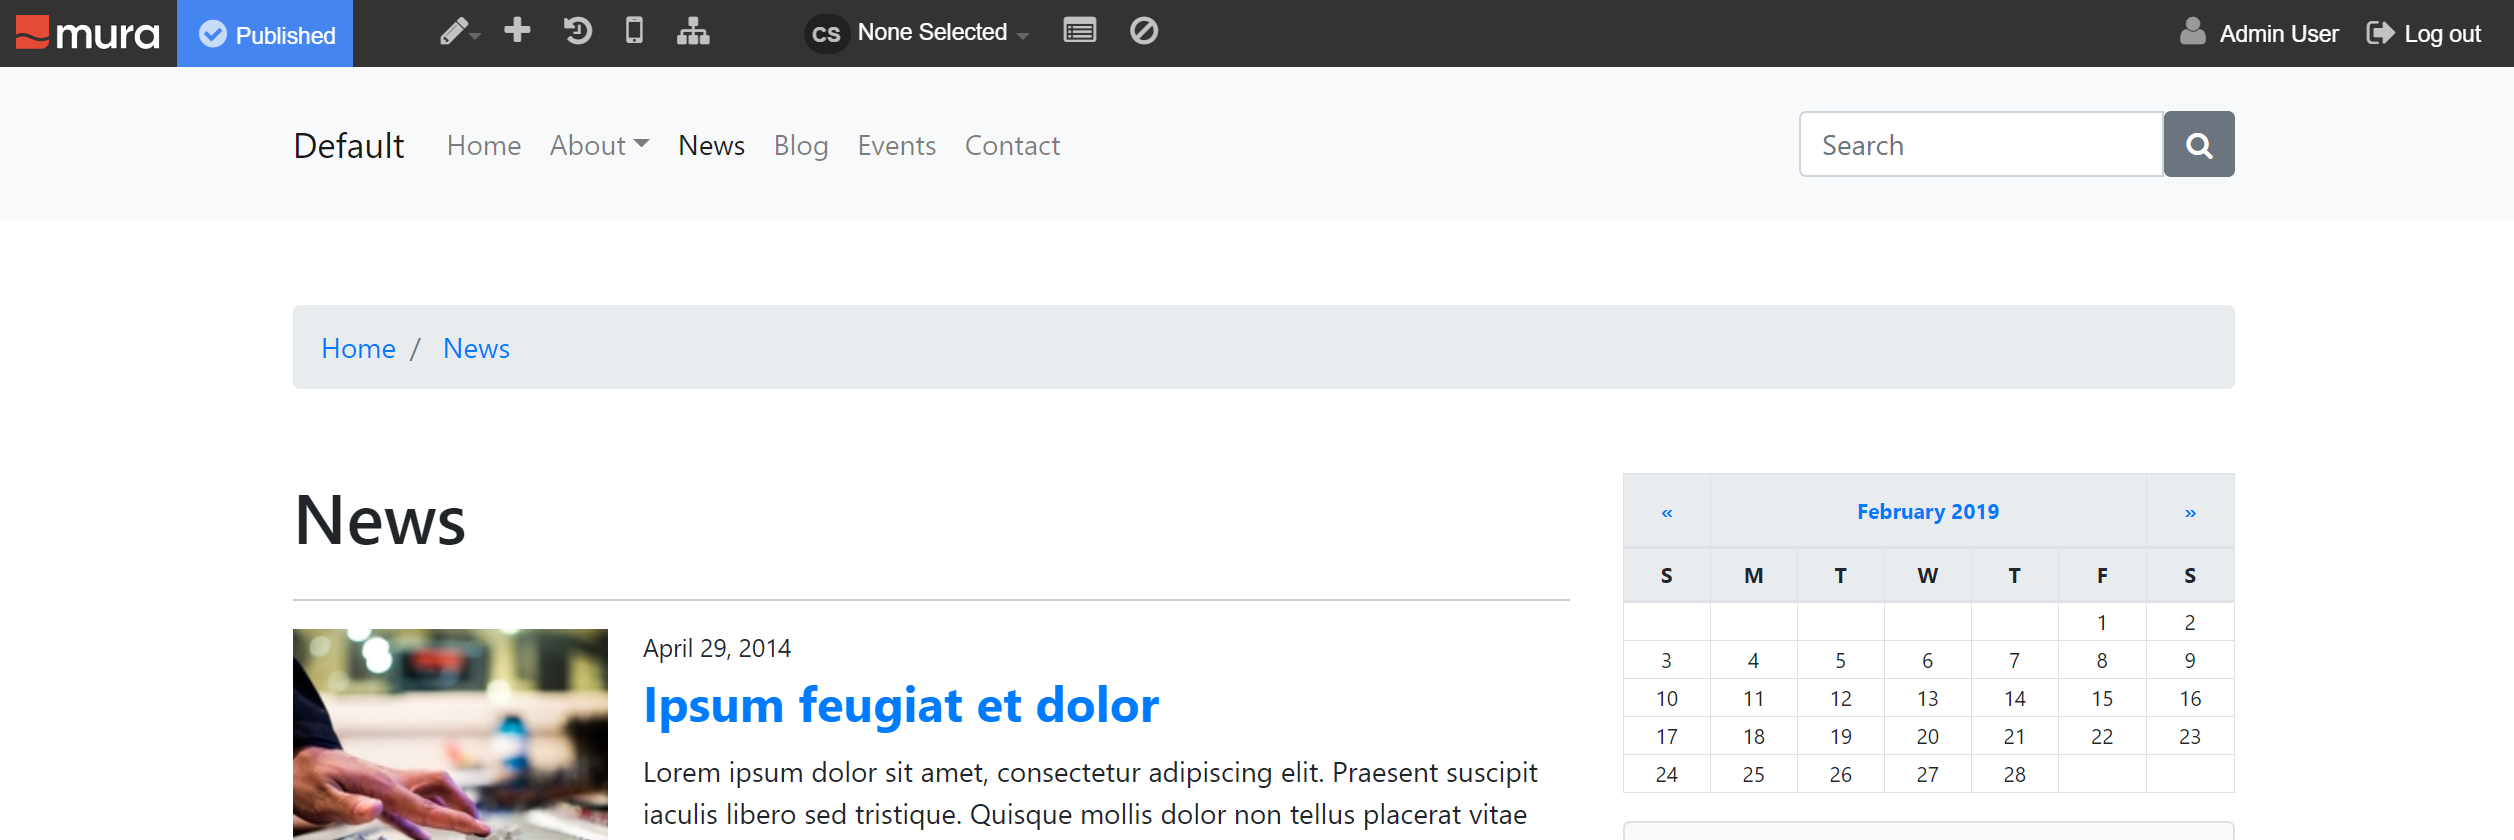
To complete the PoC I then downloaded a Mura CMS site bundle and deployed it to my site. A site bundle is a finished site that is packaged so it can be used to restore a backup or migrated a complete site to a new Mura CMS installation.
The final result is this site: https://abn-tomcat-muracms-3.azurewebsites.net/index.cfm/default/news/
I think it's very cool I could get a JAVA WebApplication running so fast and easily with almost zero prior knowledge on Mura CMS, Lucee or JAVA on Azure.
Sources:
https://docs.jelastic.com/mura-cms - this article is the background information I used. It's from a different cloud vendor but for Azure the steps are similar.